In case you missed it, the release of the Silverlight 5 beta was officially announced at MIX today. Over the next few days in addition to blogging about my experiences at MIX, I’ll also be sharing with you some new features that are available in the new Silverlight beta. In this post, I’d like to cover a handful of features that I think are exciting and will make it easier to create line of business applications.
To demonstrate these features, we’ll use a sample out-of-browser application that simply shows a list of icons with titles. I chose some social media-style icons just for the sake of a simple demonstration. The features this short demo will show include:
- Child Windows in Out of Browser (OOB) applications
- Relative ancestor binding
- Text (keyboard) selection in list boxes
Stay tuned for more on custom markup extensions, implicit data templates, typed weak references and more.
Of course, for any of this to work you’ll need to grab the Silverlight 5 beta. It will run side-by-side with Silverlight 4 (you’ll just need to make sure you specify Silverlight 4 as the target version for production applications!) You can download the new bits here.
To get started, I loaded several icons to the project. A simple type encapsulates the path to the icon and a friendly name for it, called ImageItem:
public class ImageItem
{
    public string Path { get; set; }
    public string Name { get; set; }
}
Next is a simple view model that creates the list of images.
public class MainViewModel
{
    public ObservableCollection<ImageItem> Images { get; private set; }

    public MainViewModel()
    {
        Images = new ObservableCollection<ImageItem>(new List<ImageItem>
                                                            {
                                                                new ImageItem
                                                                    {
                                                                        Path = "/TextSearch;component/facebook-icon.png", Name="Facebook"
                                                                    },
                                                                new ImageItem
                                                                    {
                                                                        Path = "/TextSearch;component/linkedin-icon.png", Name="LinkedIn"
                                                                    },
                                                                new ImageItem
                                                                    {
                                                                        Path = "/TextSearch;component/new-rss-xml-feed-icon.png", Name="RSS"
                                                                    },
                                                                new ImageItem
                                                                    {
                                                                        Path = "/TextSearch;component/twittericon.png", Name="Twitter"
                                                                    },
                                                                new ImageItem
                                                                    {
                                                                        Path = "/TextSearch;component/YouTube_icon.png", Name="YouTube"
                                                                    }
                                                            });
    }
}
Now you can pop the view model into a grid and render our images. Here is the first little addition to Silverlight 5: the addition of TextSearch. Even though there is a complex data type for our list box binding, the text search attached property allows you to specify a path that is a logical “text” representation. Why would you want to do that? To be able to select a list box item with the keyboard! This is basic functionality that has been around in things like combo boxes on the web for ages, but while subtle will be very powerful to use when wiring your list boxes. No more scroll and click, just type to jump ahead!
<Grid x_Name="LayoutRoot" Background="White">
    <Grid.DataContext>
        <TextSearch:MainViewModel/>
    </Grid.DataContext>
    <ListBox ItemsSource="{Binding Images}" TextSearch.TextPath="Name">
        <ListBox.ItemTemplate>
            <DataTemplate>
                <Grid>
                    <Grid.ColumnDefinitions>
                        <ColumnDefinition Width="70"/>
                        <ColumnDefinition Width="*"/>
                    </Grid.ColumnDefinitions>
                    <Image
                    Width="64" Height="64" Source="{Binding Path}" Tag="{Binding Name}"/>
                    <TextBlock Text="{Binding Name}" FontSize="50" Grid.Column="1"/>
                </Grid>
            </DataTemplate>
        </ListBox.ItemTemplate>
    </ListBox>
</Grid>
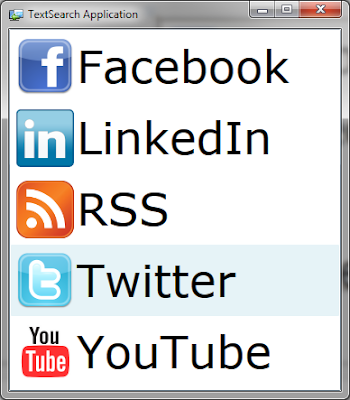
Now when you run the application and get this listbox:
You can click on the list box for focus, then type “f” for Facebook, “t” for Twitter, and so forth. The listener has a timer and will accept key combinations, for long lists that require typing out part of a word.
Next, switch the project to OOB and set elevated trust. The next cool feature to add is child windows. These are standalone windows that can exist on your desktop separate from the main application window. In this example the windows will just show a full-size image of the icon with the name in the title. First, a command to show the window:
public class ItemShowCommand : ICommand
{
    public bool CanExecute(object parameter)
    {
        return parameter != null;
    }

    public void Execute(object parameter)
    {
        var image = new BitmapImage(new Uri(((ImageItem)parameter).Path, UriKind.Relative))
                        {
                            CreateOptions = BitmapCreateOptions.None
                        };
        image.ImageOpened += (o,e) =>
        new Window
                        {
                            Title = ((ImageItem)parameter).Name,
                            Height = image.PixelHeight + 20,
                            Width = image.PixelWidth + 20,
                            TopMost = true,
                            Content = new Image {Source = image},
                            Visibility = Visibility.Visible
                        };
    }

    public event EventHandler CanExecuteChanged;
}
Notice that the command constructs and image and forces it to render immediately to size the child window. The child window creation is straightforward. By default, it will be created collapsed, so we explicitly set the visibility and size it to a margin. Creating the window will make it active – there is no assignment or other step necessary. Once wired in, an example child window will look like this:
Now the command can be added to the main view model with the definition and creation in the constructor:
public ICommand ShowCommand { get; private set; }

public MainViewModel()
{
    ShowCommand = new ItemShowCommand();
    ...
}
Great. Now we can bind to a mouse left button down on the grid … but wait! Here is a classic problem: the binding for an item in the list is an ImageItem, but the command is on the MainViewModel! How can you get to the command? Fortunately, Silverlight 5 now provides support for ancestor binding. To bind to an ancestor in the visual tree, you simply specify the type and how many levels up. The binding will find that element for you and let you bind to any of its properties. Here is the binding:
<Interactivity:Interaction.Triggers>
    <Interactivity:EventTrigger EventName="MouseLeftButtonDown">
        <Interactivity:InvokeCommandAction Command="{Binding RelativeSource={RelativeSource AncestorType=Grid, AncestorLevel=2}, Path=DataContext.ShowCommand}"
                                            CommandParameter="{Binding}"/>
    </Interactivity:EventTrigger>
</Interactivity:Interaction.Triggers>
The type to bind to is a grid. Because the trigger is a child of the grid that holds the list box item, that grid would be “level 1.” The parent of that is the list box, and then the list box parent is the grid we want, or “level 2.” By specifying this, you can now run the application and:
- Type a letter to select an item
- Click an item to pop up a new, totally separate window
Now, that’s a fairly simple example but hopefully it will help you get started with some fun experiments using the new beta. Feel free to post them here!
Grab the source for this project here.


