Continuing from part II of our series, we will next walk through setting up user authentication using Azure Active Directory.
The source related to this post is contained in the adding-authentication branch of the repo.
Creating an AAD Application
We will need to register an application with Azure Active Directory. The following are links to comprehensive documentation about this process.
- Microsoft Identity Platform – this is an overview of services that Microsoft provides for managing user identity.
- SPA Web Site – our application is a SPA implementation. It will use the OAuth 2.0 Authorization code flow (with PKCE) to authenticate a user and call web APIs.
- Registering a Web Application – instructions for creating a web application that uses MSAL.js 2.0 or greater.
- On-Behalf-Of Flow – this describes how API calls can be made by a web server on behalf of an authenticated user.
Specifically, to configure the example application:
- Update the
packages/browser-frontend/src/services/ConfigService.tsfile to include the client id and authority used for authentication.
export function fetchAuthConfig(): Promise<AuthConfig> {
  return Promise.resolve({
    clientId: "f7edc002-e261-42e5-9140-8dde2e83260c",
    authority:
      "https://login.microsoftonline.com/fa1ee923-839f-4da5-a453-6eefaf3c9699/",
  });
- Update the “Single page application” redirect URLs to point to the
testing.localdomain we’ve configured on the/auth-callbackpath.

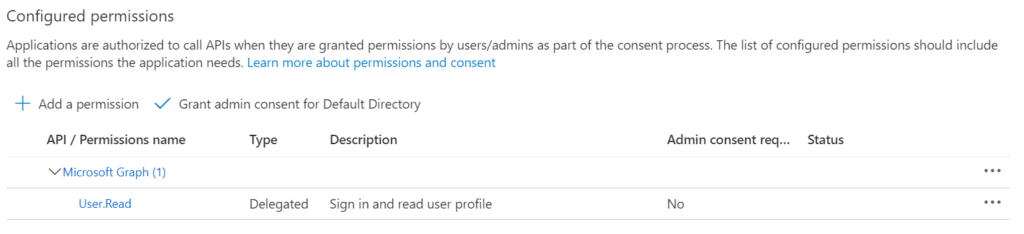
- Ensure that the Microsoft Graph
User.ReadAPI permission is enabled.
User Authentication
We use the Microsoft Authentication Library for JavaScript within the front end application. This is part of Microsoft’s Identity Platform and has the tools for authenticating the user and requesting access tokens.
The additional code within this example application wraps the MSAL authentication library into a state machine, powered by XState, as well as a React Context that wraps the state machine and allows UI components to access the machine. However, the authentication flow itself is handled by the MSAL library (found in packages/browser-frontend/src/services/AuthService.ts).
A client-side route /auth-callback is used to allow the MSAL library to handle the redirects from the authentication service and then redirect back to the main page.
Testing Authentication and the Microsoft Graph API
Once you’ve configured the application, you can start it (in “dev” mode) using npm start. Navigate to https://testing.local:3000/ and sign in to the application.
The application can also call the “Me” method from the Microsoft Graph API. The following function retrieves the access token for the User.Read scope and passes it on to the “Me” endpoint.
export function fetchMeFromBrowser() {
  return getUserDetails()
    .then((details) => {
      if (!details.isAuthenticated) {
        throw new Error("User is not signed in.");
      }
      const { bearerToken } = details;
      return fetch("https://graph.microsoft.com/v1.0/me", {
        method: "get",
        headers: new Headers({
          Authorization: `Bearer ${bearerToken}`,
        }),
      });
    })
    .then((rsp) => {
      if (!rsp.ok) {
        throw new Error(`Request was not successful (HTTP: ${rsp.status})`);
      }
      return rsp.json();
    });
}
We can also update the container image for the web application to use within the Kubernetes cluster by running the build and initialization scripts again:
packages/browser-frontend/deploy/build-frontend-image.ps1
packages/browser-frontend/deploy/initialize-frontend.ps1
Then navigate to the Kubernetes ingress endpoint, https://testing.local:31001/.
Next up, we’ll create a back-end web API for the front-end application to use, including verifying the identity of the user and making a request to the Microsoft Graph API on behalf of the user.