This is a quick walkthrough to demonstrate how to make what I call “clean” design-time view models. These are view models that provide design-time data for your application, but don’t embed that data in the final product. The release DLL and XAP files will only contain run-time support.
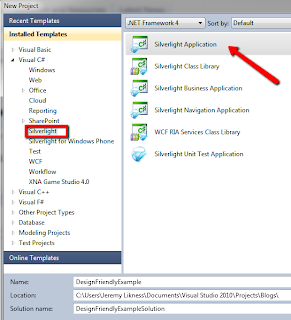
First, fire up Visual Studio and create a new Silverlight application. Just use the default template.
Keep all of the defaults on the dialog that prompts for hosting the application in a new web site (leave this checked) and use Silverlight 4. There is no need to check the “RIA Services” box for this example. When you confirm the dialog, the default project is created for you.
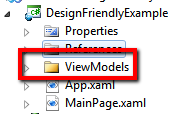
Next, add a folder called “ViewModels.”
In the ViewModels folder, add a new class named MainViewModel. Make it a partial class. Create a string property called “Name”, an observable collection of strings called “Widget,” and implement INotifyPropertyChanged. Here is the code for the view model:
public partial class MainViewModel : INotifyPropertyChanged
{
    public MainViewModel()
    {
        Widgets = new ObservableCollection<string>();
    }

    private string _name;
    public string Name
    {
        get { return _name; }
        set
        {
            _name = value;
            RaisePropertyChanged("Name");
        }
    }

    public ObservableCollection<string> Widgets { get; private set; }

    protected void RaisePropertyChanged(string propertyName)
    {
        var handler = PropertyChanged;
        if (handler != null)
        {
            handler(this, new PropertyChangedEventArgs(propertyName));
        }
    }

    public event PropertyChangedEventHandler PropertyChanged;
}
As you can see, it is a fully functional view model, and no design-time data has been included yet. Next add a special compiler symbol to allow switching from design mode to release mode. Right click on the Silverlight project and go to the properties tab. Click on the “Build” sub-tab, and add the “DESIGN” compiler symbol:
Next, add a class that extends the view model partial class. Name it MainViewModel.sampledata.cs. Place this code in the file:
public partial class MainViewModel
{
#if DESIGN
    private void _WireDesignerData()
    {
        if (!DesignerProperties.IsInDesignTool) return;

        Name = "This is a design-time name.";
        var widgets = new[] { "Widget One", "A Second Widget", "The Third and final Widget" };
        foreach (var widget in widgets)
        {
            Widgets.Add(widget);
        }
    }
#endif
}
Notice the use of the compilation symbol that was added earlier. When you save the file, your solution should look like this:
Wire the call to the new method from the main view model class, wrapping it in the conditional tag – you may have to compile first to get Intellisense for the design-time method:
public MainViewModel()
        {
            Widgets = new ObservableCollection<string>();
#if DESIGN
            _WireDesignerData();
#endif
        }
Build the solution so the view model is available for wiring into the designer surface. Finally, go into the MainPage.xaml and add a grid and a list box bound to the view model. Be sure to add the namespace for your view model:
xmlns:ViewModels="clr-namespace:DesignFriendlyExample.ViewModels" mc_Ignorable="d"
Then wire the remaining XAML:
<Grid x_Name="LayoutRoot" Background="White">
    <Grid.DataContext>
        <ViewModels:MainViewModel/>
    </Grid.DataContext>
    <Grid.RowDefinitions>
        <RowDefinition Height="Auto"/>
        <RowDefinition Height="*"/>
    </Grid.RowDefinitions>
    <TextBlock Grid.Row="0" Text="{Binding Name}"/>
    <ListBox Grid.Row="1" ItemsSource="{Binding Widgets}"/>
</Grid>
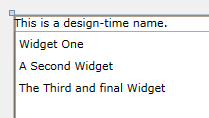
You should immediately see the design-time data appear in the designer:
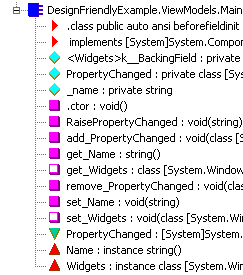
You can now design with designer data. If you compile and run the application, you’ll see the page is blank because the design-time data only is populated in the designer. The only problem is that the XAP and DLL right now are “dirty.” If you look at the DLL generated and open it using ILDASM this is what you’ll find:
The design-time data has made the DLL larger by adding extra methods and text literals to load into the view models, and adds code that is not used in the run time. When you are ready to release your Silverlight application, simply go back to the properties for the Silverlight project and remove the “DESIGN” compilation symbol. Rebuild the project – it will build and run fine. However, if you take a look at the generated DLL now, the design-time data is no longer there and the DLL is smaller because the data has not been included – as you can see, the method to wire the data doesn’t event exist on the view model:
Obviously this example worked with a very specific way of adding the view model to the view. Different frameworks have different ways of binding views and view models. This walkthrough should give you an idea of how to keep te design-time data separate regardless of the method you use and produce cleaner applications when design-time data is no longer needed.


