With the ease of creating resources on Azure, getting a project up and running on the cloud is not only fast but straightforward. A primary consideration for creating resources on Azure is how those resources are created. Even though the process of creating resources through the Azure portal is simplistic, it is a manual process and is prone to the same issues as any manual process: user errors, inconsistent repeatability, dependent on, change drift. For these reasons, there is another approach to consider: deploying resources using Azure Resource Manager templates or ARM templates for short. ARM templates are JSON files that define Azure resources and help mitigate the issues of manually deploying resources by providing the following benefits:
- Infrastructure as Code – ARM templates can be managed, versioned, and maintained in a source code repository, which means no more remembering how to configure a resource.
- Automated – Because ARM templates contain all the details needed to provision resources, they can be deployed automatically by a CI/CD pipeline removing the need for human intervention.
- Idempotent – When deploying an ARM template, the same results are produced consistently over and over again. Azure identifies the changes that need to be executed to ensure the resources in Azure match the ones defined in the template, and this can prevent resource drift.
ARM templates can be extremely helpful and with that in mind, here are a few tips to help get the most out of them.
The Tips
ARM templates generated from existing Azure resources
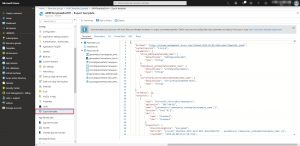
A quick way to get your feet wet with ARM templates is to view the templates generated from existing Azure resources. To do so, navigate to the Azure portal, select any resource you have access to, and from the resource blade’s menu, select Export template. The Export template view will display the JSON used to generate that resource as well as provide options to view the Azure CLI, PowerShell, and .Net versions. There are also options to save the template in Azure or download it.
One thing to note about the Exported templates is that the output is very verbose. The output actually includes the default values for that particular resource, so as a result, it can be a bit intimidating reviewing the template at first. The next tip will help with respect to simplifying understanding the contents of an ARM template.
Get a jump start from the quick start templates
Whereas the Azure portal’s Export template feature produces a verbose JSON file, the Azure GitHub repo for quick start templates is minimalistic. The Azure quick start templates repo has an extensive collection of starter templates ranging from simple to advance, one resource to many. The ARM template JSON in the repo’s child directories contains the properties needed to create a resource allowing you, the user, to modify as necessary without navigating through all of the default settings.
Parameters, variables, and outputs are your friends
Once an understanding of ARM template structure and content is understood, the customization of resources will be a lot easier to grok. Some of the main elements that will aid in the creation/modification of resources are Parameters, Variables, and Outputs. Utilizing these elements allows for crafting more dynamic and consistent ARM templates. Because hard-coded values are reduced, the ability to make modifications and manage templates over time is greatly improved.
Resource group template functions want to be your friend too
Parameters, Variables, and Outputs are not the only constructs available to streamline ARM template creation. There is an entire collection of functions available for inclusion in a template. These functions can aid in working with arrays and objects, getting resource values, or even interacting with strings.
Copy functionality
While creating Azure resources, sometimes there is a need to duplicate resources and properties. The duplication can be accomplished by doing a simple copy and paste with some editing, but this approach is prone to errors and not practical for large tasks. This particular scenario is ideal for ARM template copy functionality. The copy functionality can remove the issues created by manual copy and paste errors. The functionality can also make the process of creating duplicate resources and properties dynamic by relying on Parameters, Variables, and Output values.
Break up your ARM template
Some projects require a large assortment of resources to be deployed to meet feature needs. It isn’t farfetched to imagine that a project could easily require the deployment of multiple app services, databases, Azure Functions, and queue resources. With this many resources needed, an ARM template could quickly become very large and complicated to manage as the number of resources grows. For that reason, ARM templates can have resources encapsulated in separate JSON files and then linked to the main template.
Linked templates allow resources to be extracted from the main template file preventing the creation of a hard to manage monolithic ARM template. When resources are isolated in files, it also makes the process of debugging easier because there is a separation of concerns. For example, if a VM continuously fails, deploying just that template might make it easier to triage the issues instead of trying to account for additional resources.
Remember the location of DependsOn matters
The DependsOn element is used for defining resources that have dependencies on other resources. There are a few things to keep in mind when using this element. For starters, DependsOn creates a deployment dependency. That is, the resource you DependOn MUST be created before the current resource. For example, a web site depends on having a web server. If there are no dependencies, it can be created by ARM in parallel. Another consideration is that the DependsOn element can only be used to create dependencies in its current template. So this means that any linked template’s resources cannot be used as a dependency.
Configure AppSettings
ARM templates can be used to populate app settings for a resource. This functionality works well in conjunction with Parameters, Variables, and Output values to ensure that app settings use little if any hard-coded values.
"appSettings": [
    {
        "name": "WebApiEndPoint",
        "value": "[parameters('webApiEndpoint')]"
    },
    {
        "name": "OutputValue",
        "value": "[parameters('outputValue1')]"
    },
]
Service Bus Queue gotcha
Here is a tip that is pretty specific to Service Bus and caught me a bit by surprise when I made the realization. When a Service Bus Queue is created, the template for the Queue can be viewed in the portal using the Export template functionality described earlier. So you might see the following properties for a Queue that has partitioning enabled and a max size of 1 GB:
"properties": {
    "lockDuration": "PT30S",
    "maxSizeInMegabytes": 16384,
    "requiresDuplicateDetection": false,
    "requiresSession": false,
    "defaultMessageTimeToLive": "P14D",
    "deadLetteringOnMessageExpiration": false,
    "enableBatchedOperations": true,
    "duplicateDetectionHistoryTimeWindow": "PT10M",
    "maxDeliveryCount": 10,
    "status": "Active",
    "autoDeleteOnIdle": "P10675199DT2H48M5.4775807S",
    "enablePartitioning": true,
    "enableExpress": false
}
With partitioning enabled the maxSizeInMegabytes property is configured to be 16GB as detail in the docs. The gotcha to this generated template is that it cannot be used as is. Trying to deploy the template will result in the following error:
"error": {
    "message": "SubCode=40000. The specified value 16384 is invalid. The property MaxSizeInMegabytes, must be one of the following values: 1024;2048;3072;4096;5120. TrackingId:4a182ffe-625e-4bfb-a5c7-d09e13f76f7a_M3CH3_M3CH3_G7, SystemTracker:armtemplateexample:Queue:partitionenabledqueue, Timestamp:2019-04-08T16:44:14 CorrelationId: c2e383fc-0249-4687-b10f-2ce316fcad3b",
   "code": "BadRequest"
}
In order to successfully deploy the template, the maxSizeInMegabytes property needs to have its value changed from 16384 to 1024. This will result in the Queue having a final max size of 16GB.
"properties": {
    "lockDuration": "PT30S",
    "maxSizeInMegabytes": 1024,
    "requiresDuplicateDetection": false,
    "requiresSession": false,
    "defaultMessageTimeToLive": "P14D",
    "deadLetteringOnMessageExpiration": false,
    "enableBatchedOperations": true,
    "duplicateDetectionHistoryTimeWindow": "PT10M",
    "maxDeliveryCount": 10,
    "enablePartitioning": true,
    "enableExpress": false
}
Make use of Azure DevOps Pipelines
As mentioned earlier, a benefit to using ARM templates is the ability to automate the deployment process. There are many tools and services that can be used to deploy an ARM template including Azure DevOps. Azure DevOps, provides a platform to manage many aspects of a software development project including a CI/CD pipeline system. For a step-by-step guide to setting up Azure DevOps look no further. By using a CI/CD pipeline, not only can Azure resources be deployed but supporting code to configure and initialize resources can be executed via the same mechanisms.
Outie
ARM templates are a tool that can streamline and improve the consistency of Azure resource deployments. By making the process of managing Azure resources much like the process of managing software source code, projects can further focus on delivering value and even less on managing infrastructure.
Next steps
Find below some additional links to help you dig into ARM templates even more. Happy Coding.
- Best Practices For Using Azure Resource Manager Templates
- User-defined template functions
- Creating and deploying Azure resource groups through Visual Studio
- Tutorial: Create linked Azure Resource Manager templates
- Webinar – Arm your Azure Infrastructure